In this blog post, I will explain how I built the world’s worst gaming console (at least by today’s standards but it makes it one of the best anti-gaming consoles today in my opinion):
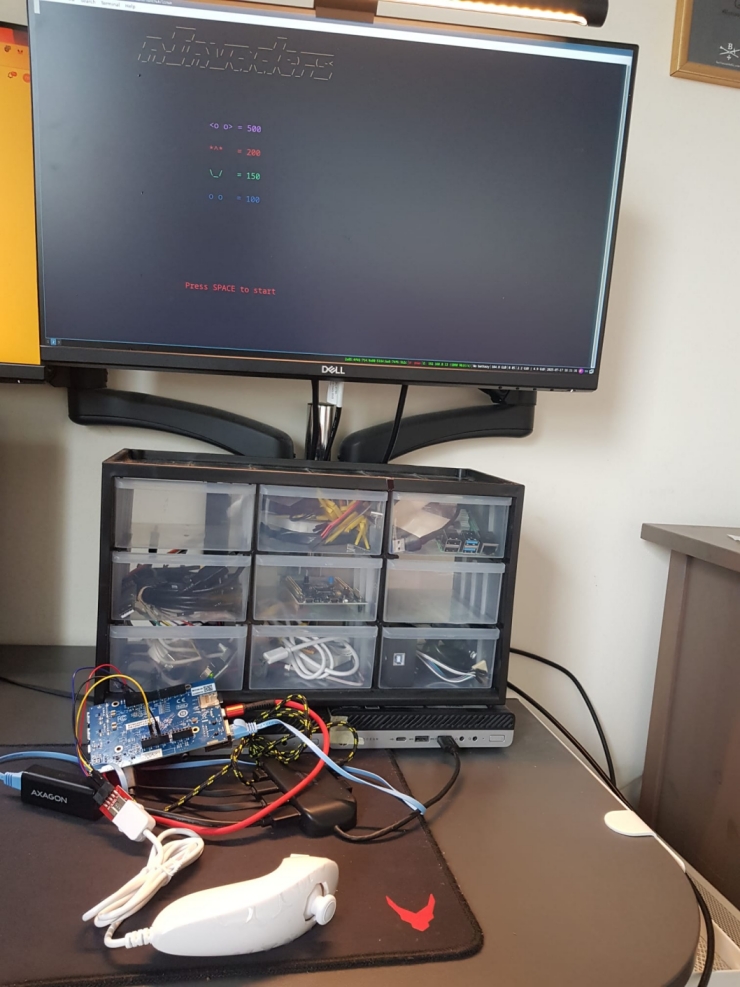
As you can see from the picture above, the user experience is terrible and this console is extremely poorly portable because of cabling and jumper wires used to connect the Wii Nunchuck and the STM32MP157D-DK1 board. Other than that there is only one game you can play and it’s nInvaders - a ncurses Space Invaders clone.
This is exactly why it’s one of the best anti-gaming consoles.
Table of Contents
- Introduction
- Writing a recipe to support nInvaders and integrating it to an existing layer
- Applying patches to an existing recipe by adding joystick support
Introduction
in this blog post, I will be using the setup I describred in my Setting up workspace for developing and building custom Linux-based distributions with Yocto blog post.
Similary to my previous posts, this writeup is based on Bootlin’s Yocto labs. And as always, thanks to Bootlin for making their materials free and open source!
Before we continue, I would like to give a quick refresher of some basic terms used when working with Yocto as described in my previous post with regards the Setting up Yocto for efficient embedded Linux system development:
bitbake: Yocto’s main build engine that functions like a task scheduler parsing text files (i.e. recipes) to what to build and how to build itrecipe: a text file that describes how to fetch and build a software component - program, library or an imagetask: a specific step of the build process / a smaller execution unit of a recipe being built- for example:
fetch,configure,compile,package
- for example:
metadata: configuration files, recipes, classes and include files organized inlayerswhich act as an input tobitbakelayer: a set of configuration files, recipes, classes and include files with a common purpose- for example,
meta-stm32mp15xfor STM32MP157x board support package openembedded-coreis the core layer that all other layers a built on top of
- for example,
poky: Yocto’s reference distribution (tools and metadata) which serves as a starting point for building custom embedded Linux system
If you want more details, either check out the previous blog post or better yet, check out the official Yocto Project terms.
Writing a recipe to support nInvaders and integrating it to an existing layer
Before downloading nInvaders, make sure you run the follwing command in poky’s root directory:
source oe-init-build-env
This now lets you use bitbake for your builds.
Next, locate the recipes-extended directory and create a directory for nInvaders where you will download the source code of the game. In my case, this was:
/yocto-stm32-labs/meta-openembedded/meta-oe/recipes-extended/ninvaders
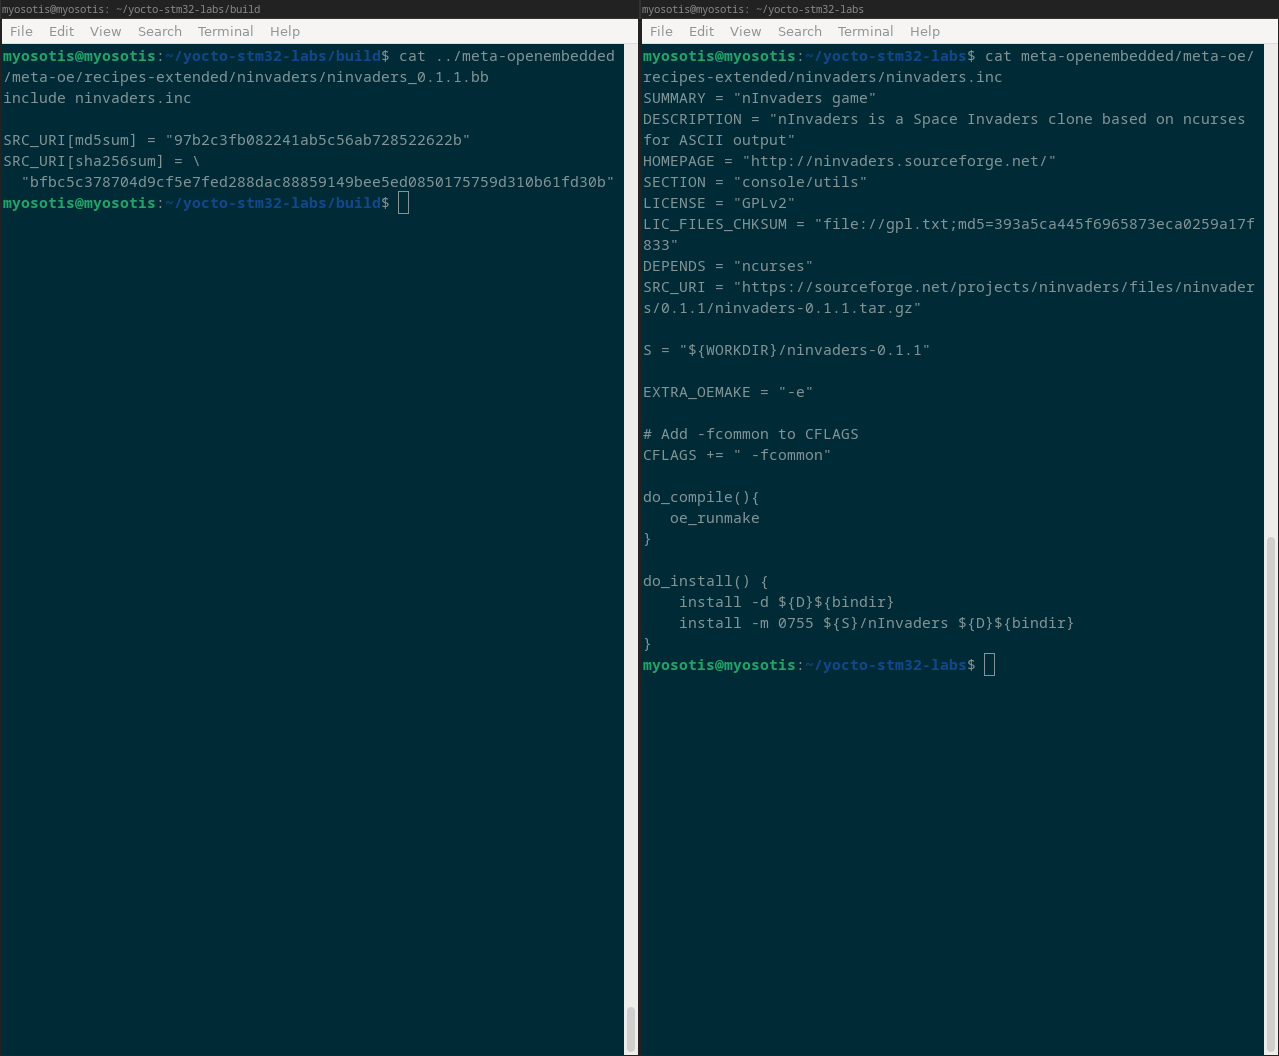
Next, inside the same directory, create a recipe which will tell bitbake how to handle building nInvders. The recipe name should follow the Yocto nomenclature - {recipe_name}_{recipe_version}.bb. More info on Yocto naming conventions can be found here.
The link to my recipe can be found on my corresponding GitHub page. Here is a preview of how I’ve written the recipe:
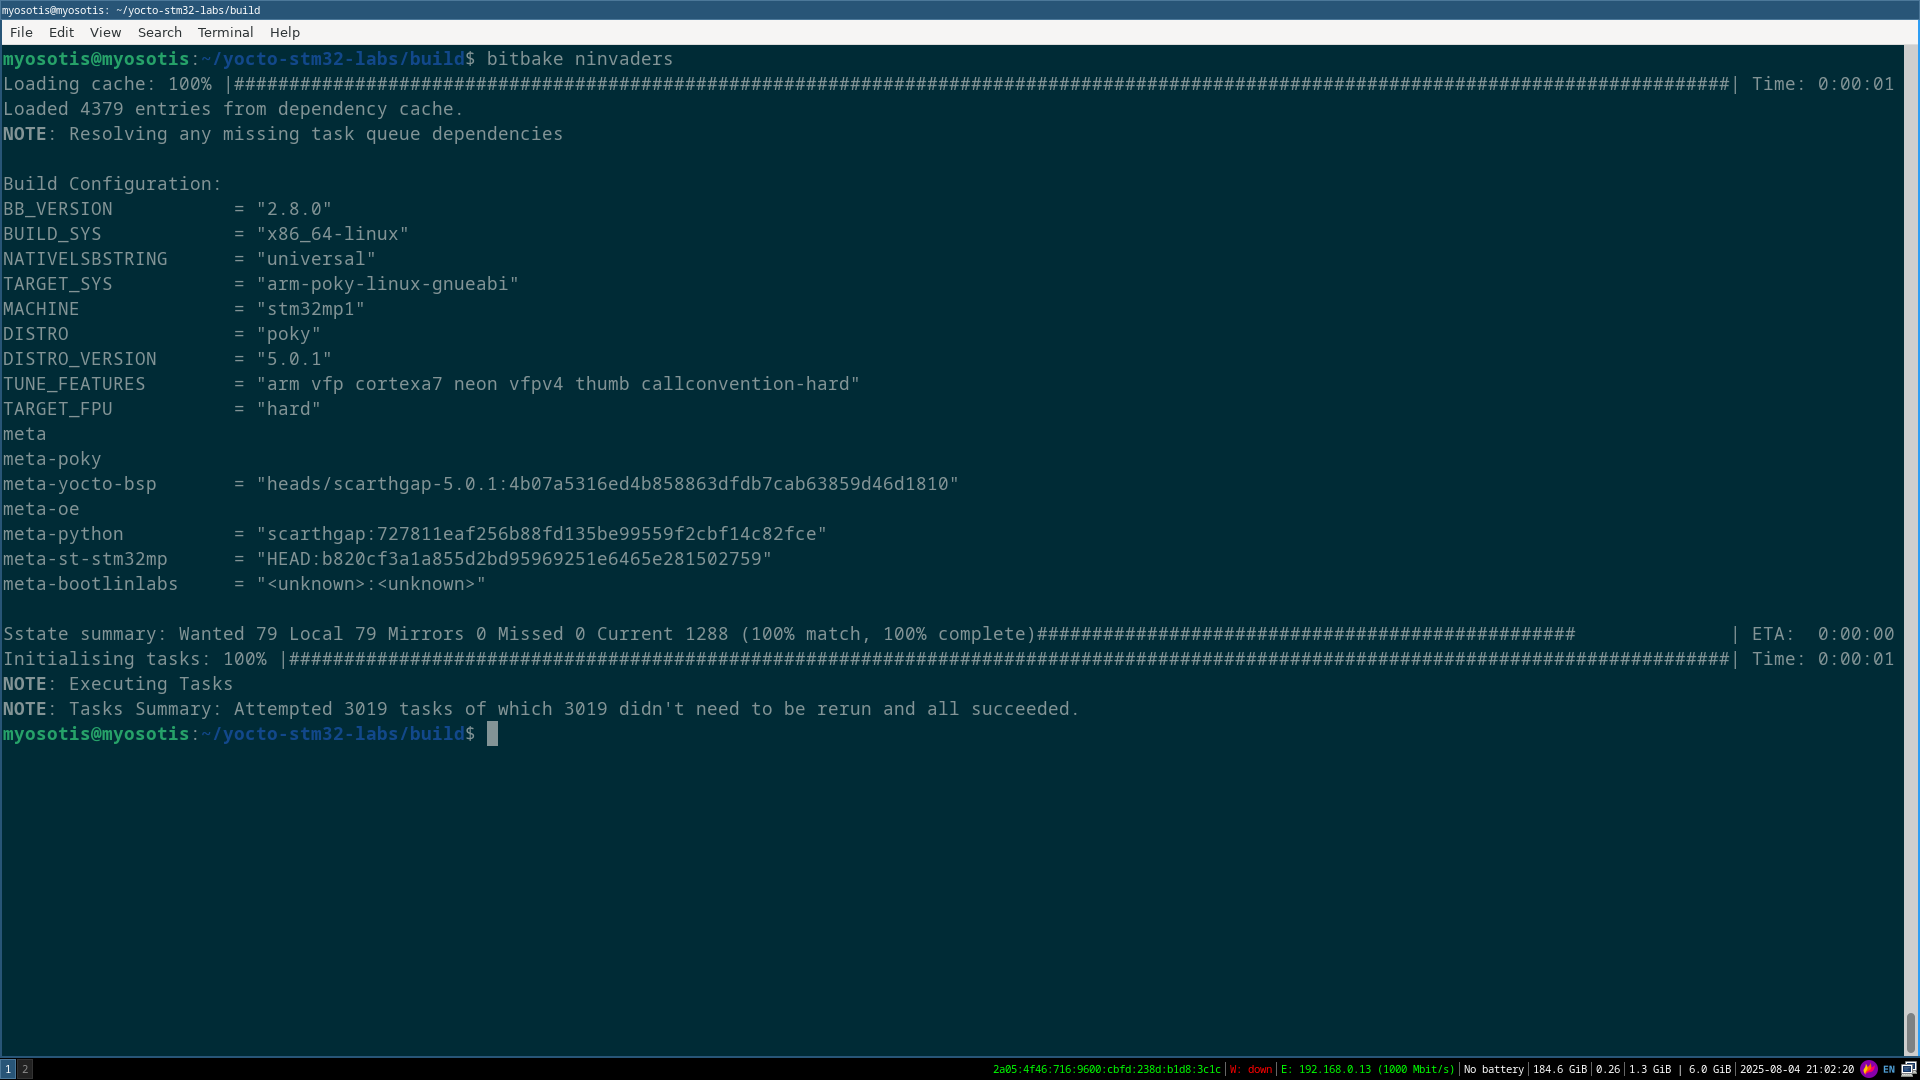
You can now build the recipe by running:
bitbake ninvaders
Output of the build process should look something like:
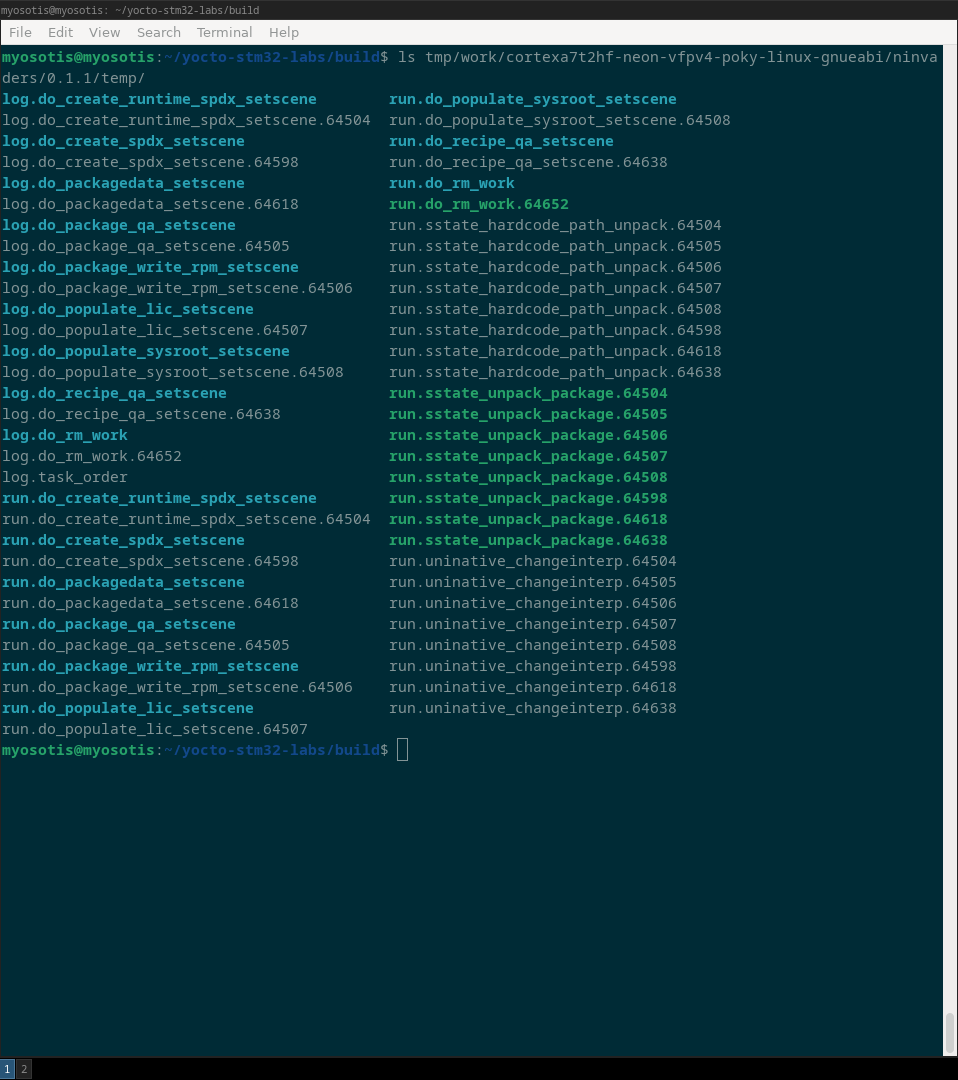
Build files of the recipe we have now built is in tmp/work/... folder:
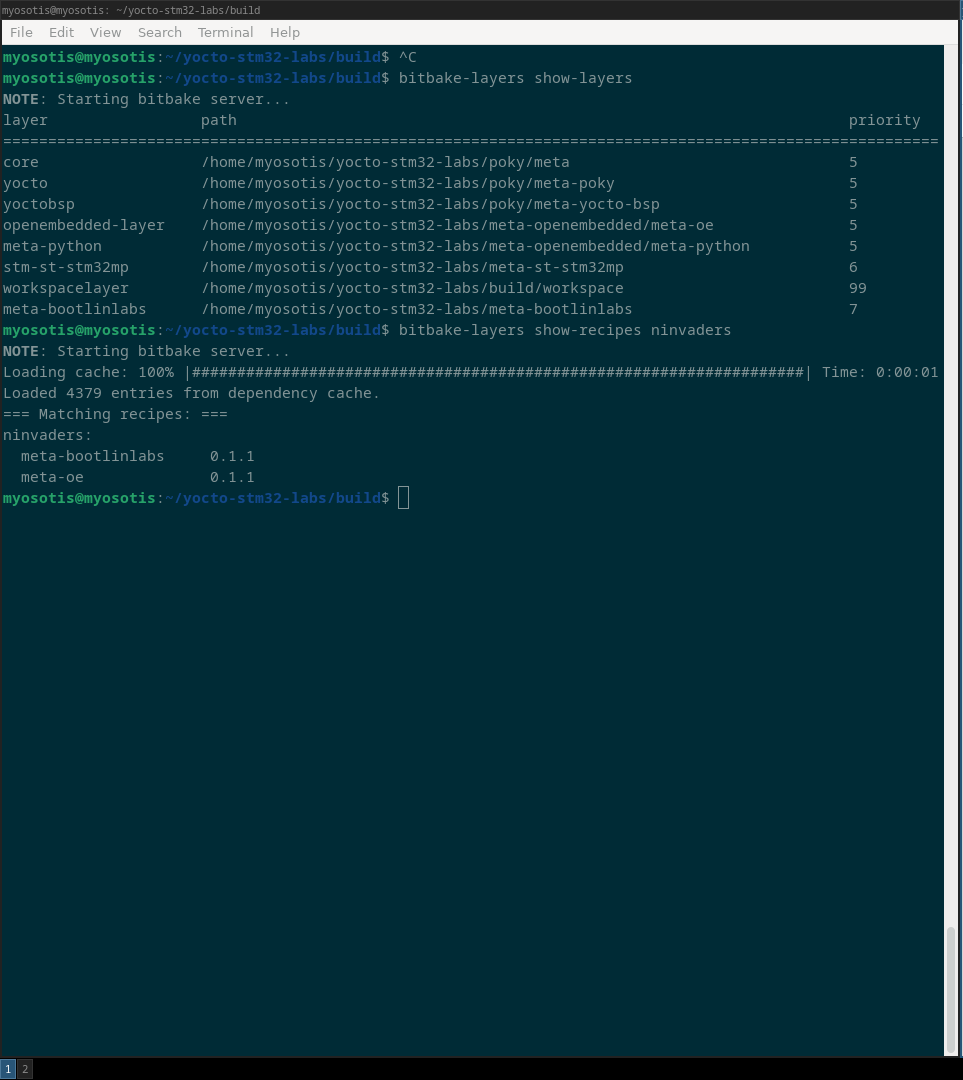
A good practice before generating a new image which will end up on the target board is to verify in which layer is the recipe which contains our application present as well as is the application built for proper architecture which is arm in our case.
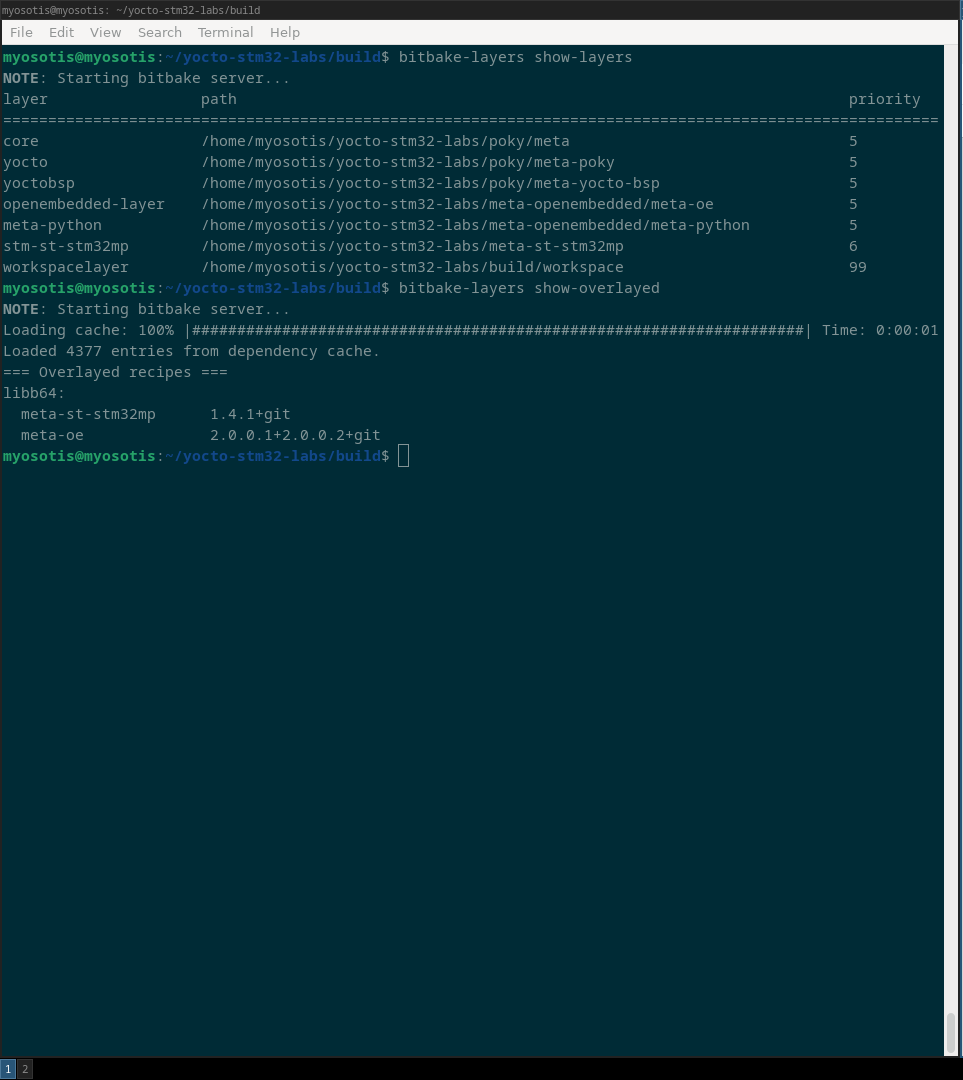
Running bibake-layers show-layer ninvaders from the build folder will show where is our recipe present:
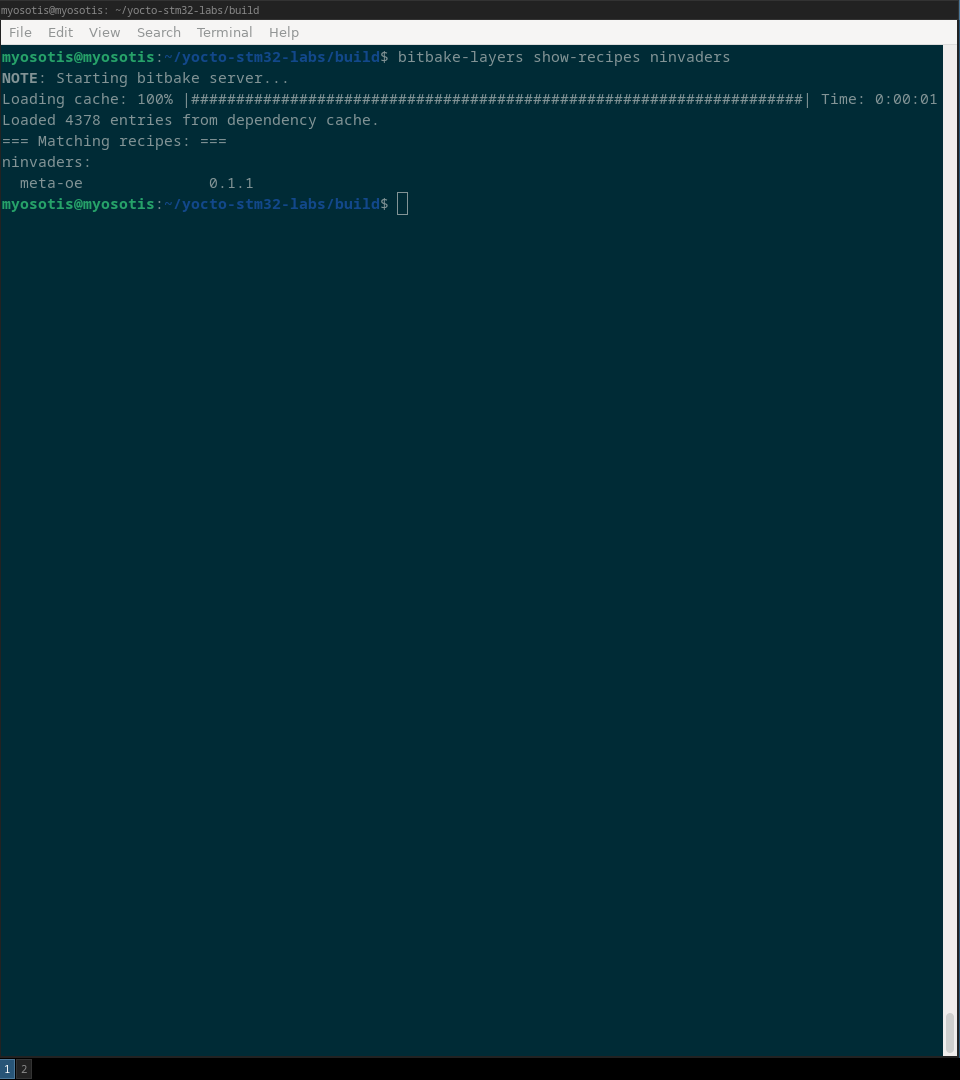
Great, our recipe is included in the meta-oe layer. Even though this is not the best practice (and we will fix that in quite soon), we can be sure that it is included in the build since meta-oe is definately included in the build:
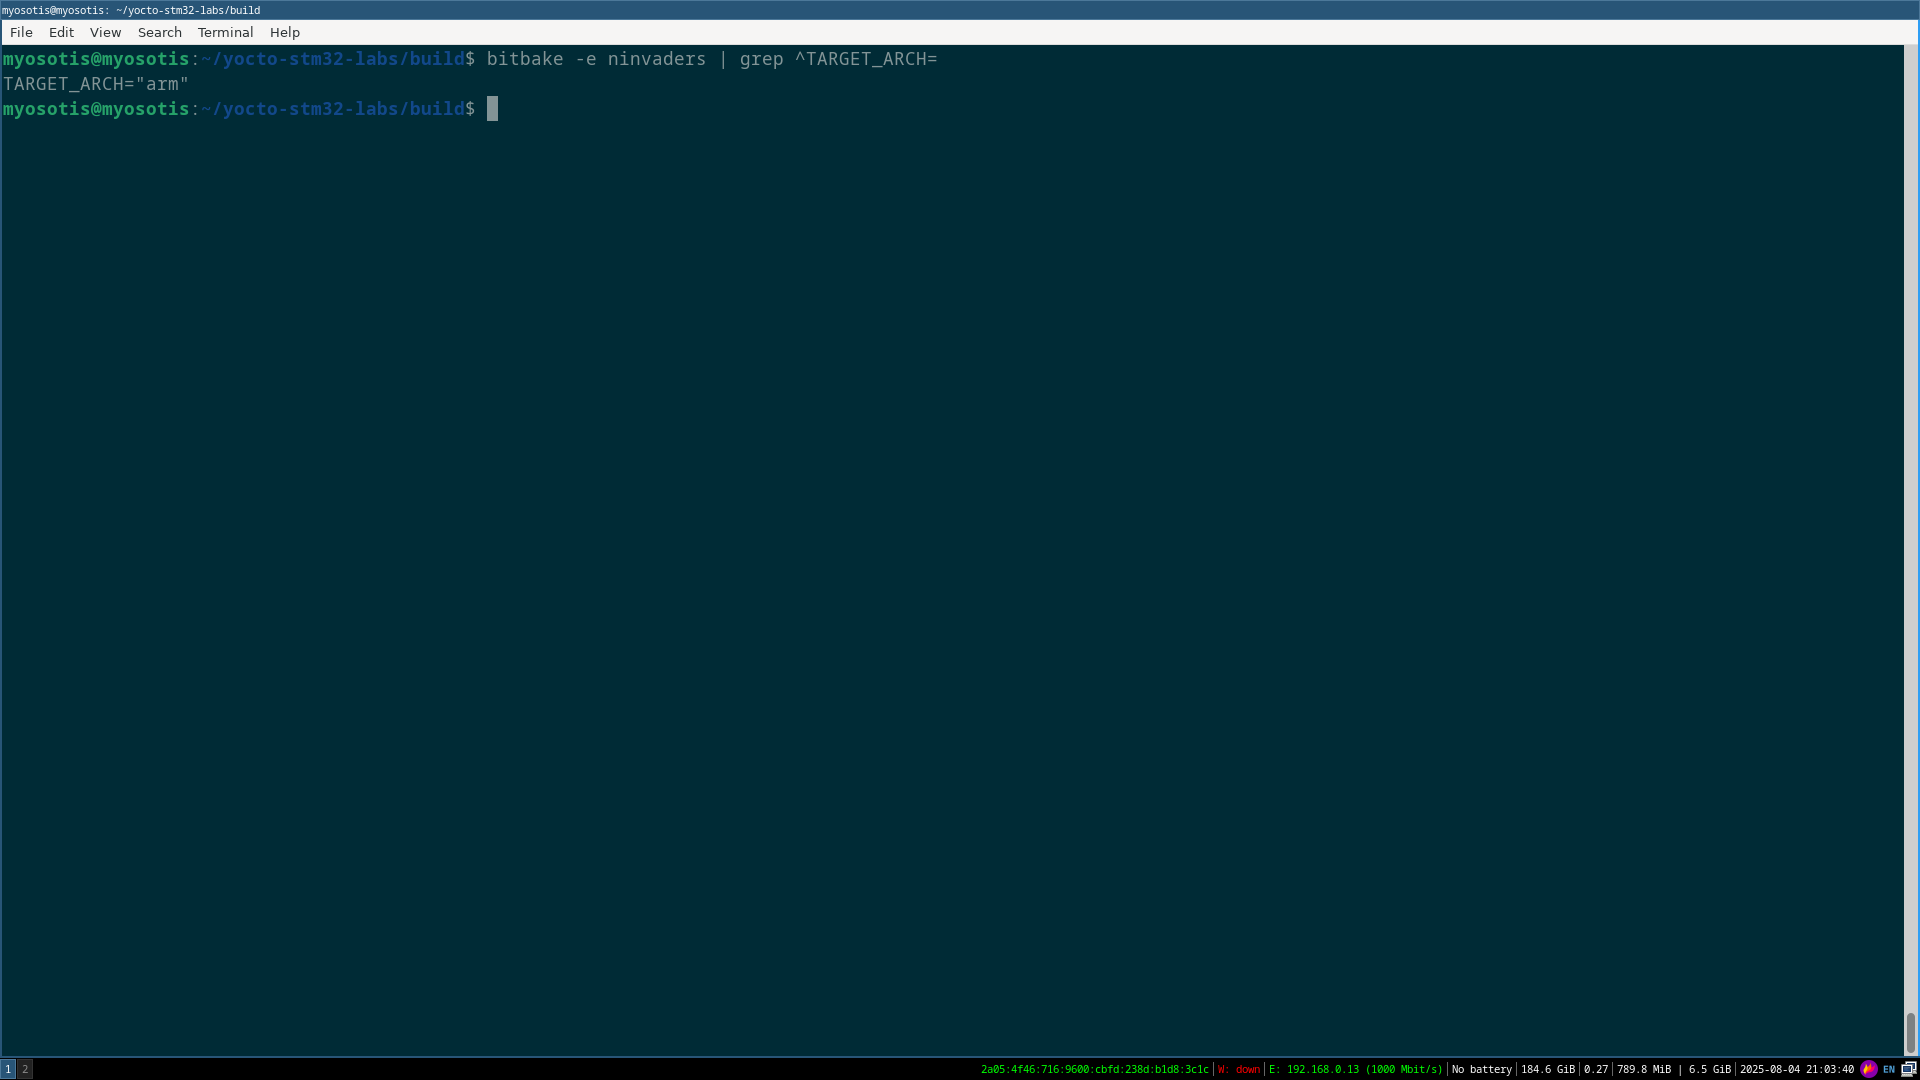
Finally, let’s verify that the ninvaders recipe has been built for proper architecture by running bitbake -e ninvaders | ^TARGET_ARCH=:
Once nInvaders recipe has been successfully built, generate a new rootfs image which will contain nInvaders by running:
bitbake core-image-minimal
The image with our ninvaders application is now in /tmp/deploy/images... and we can now extract the image to our NFS root directory on the host machine (/nfs):
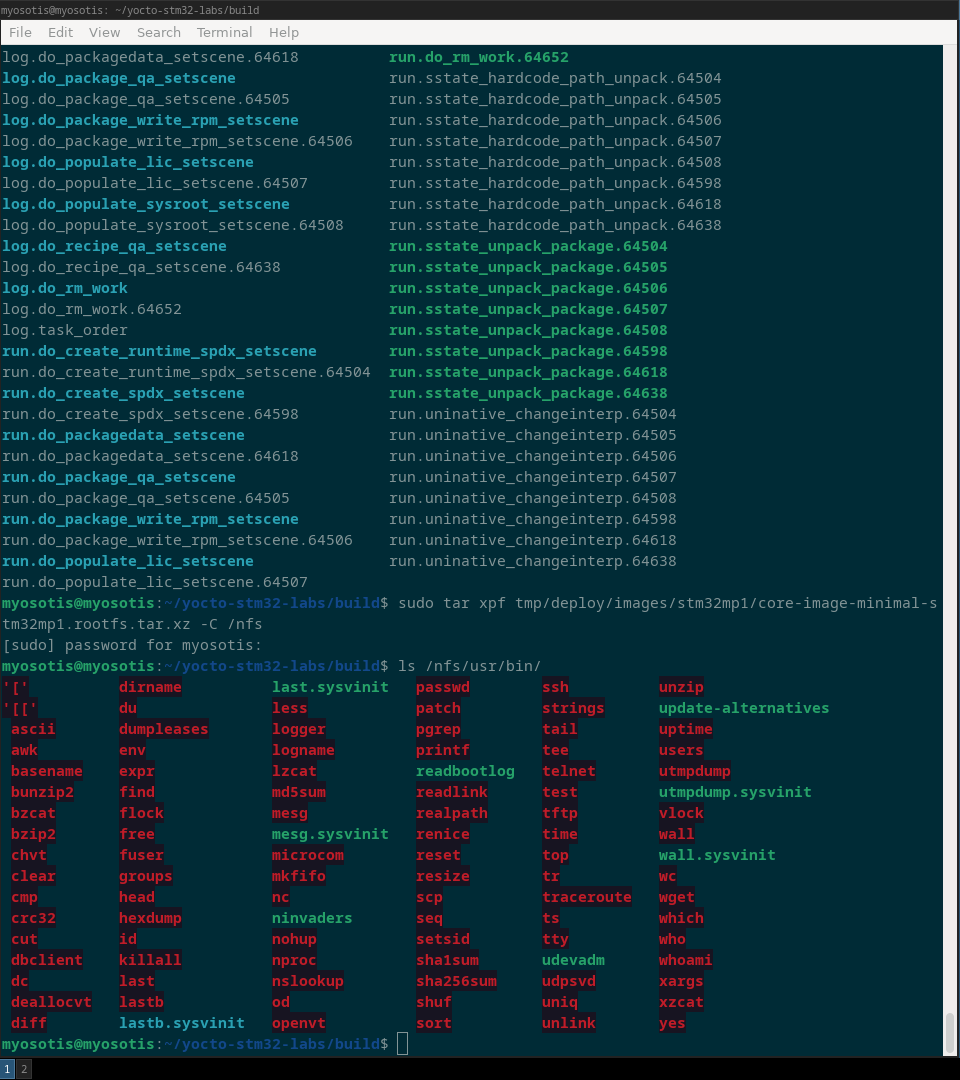
where we see our ninvaders app in the third column in the lower mid section. Great!
We can now just connect over ssh to board, and run nInvaders from /usr/bin by running /usr/bin/ninvaders:

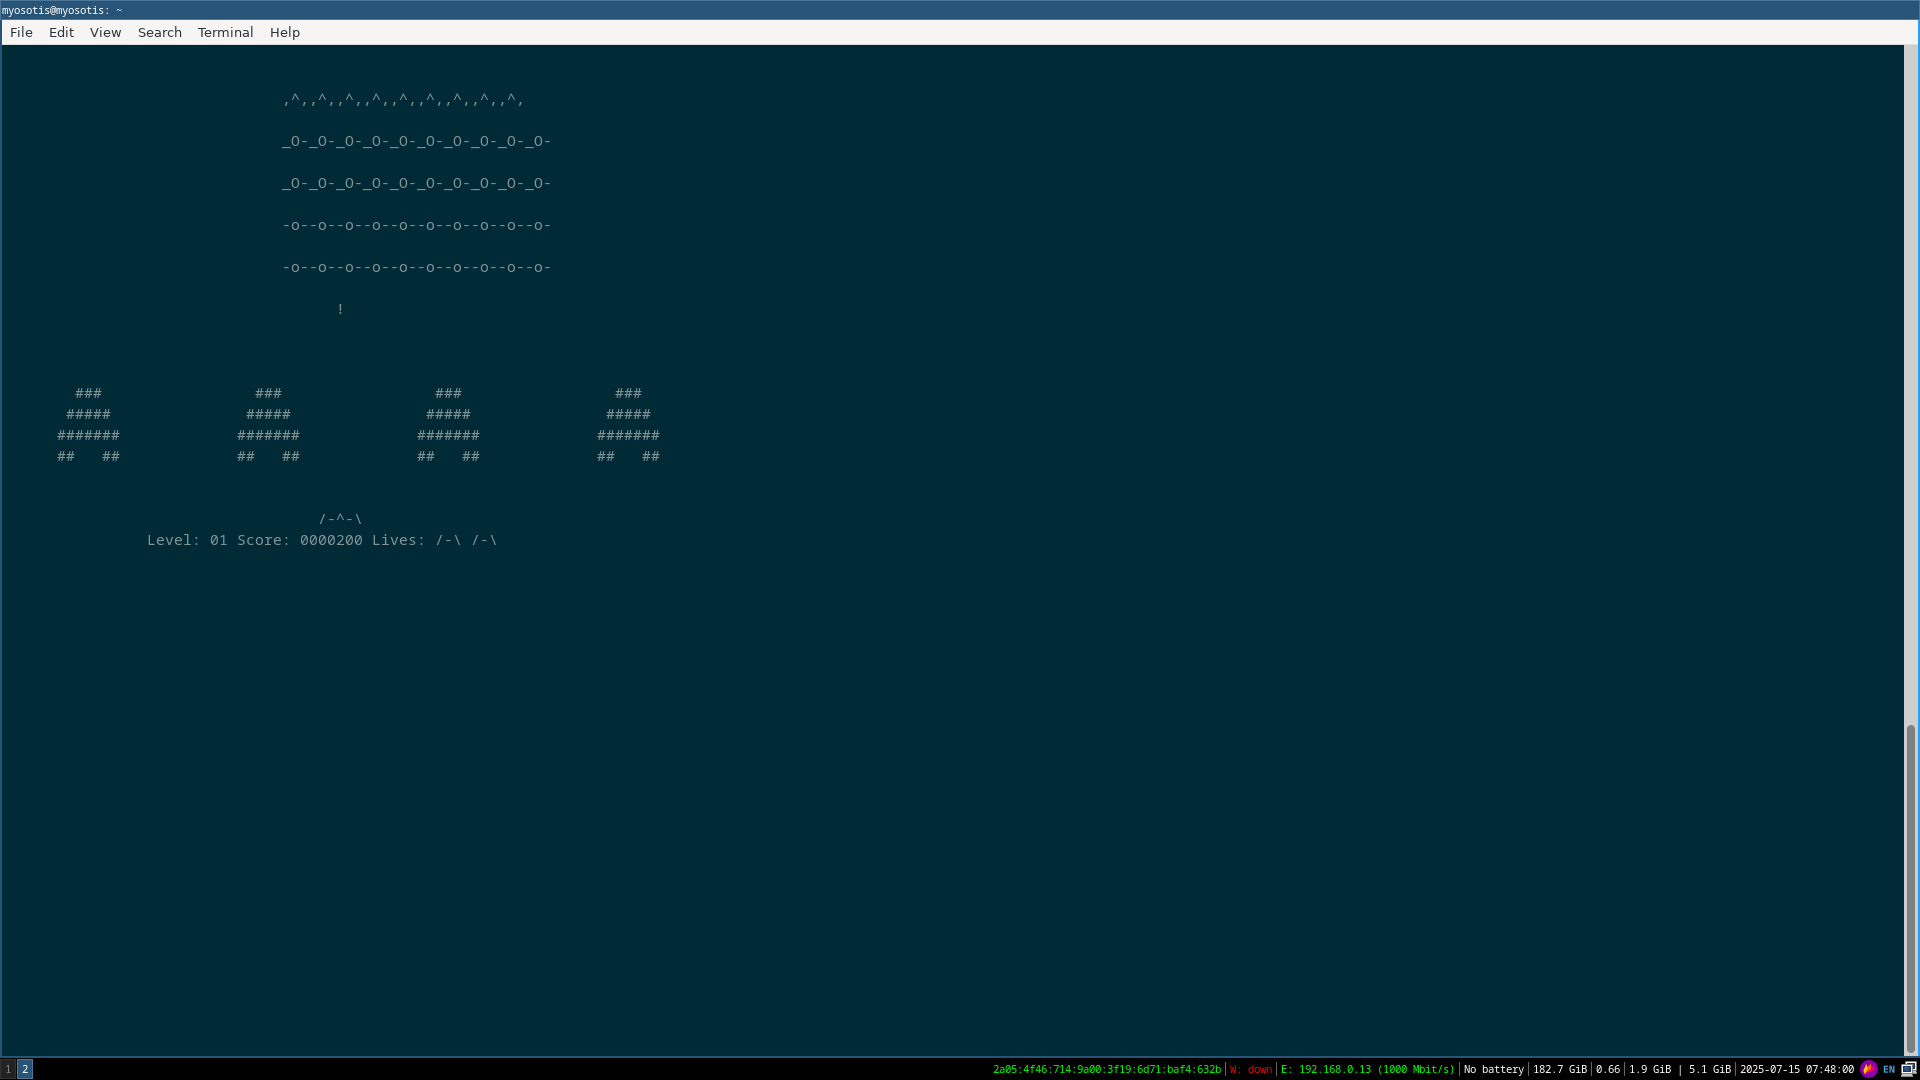
We can now use the keyboard to play nInvaders on STM32MP157D-DK1!
Creating and integrating a custom Yocto layer into the build
It is a good practice to leave your custom software fully decoupled from basic Yocto project files. This goes for both adding new recipes or customizing the existing ones. This is why I will go through explaining how to create a new layer with our application which we will integrate into the build.
Let’s add a new layer into the build. This can be done by running:
bitbake-layers reate-layer meta-bootlinlabs --priority 7
You can now verify that the layer has been added either by running bitbake-layers show-layers:
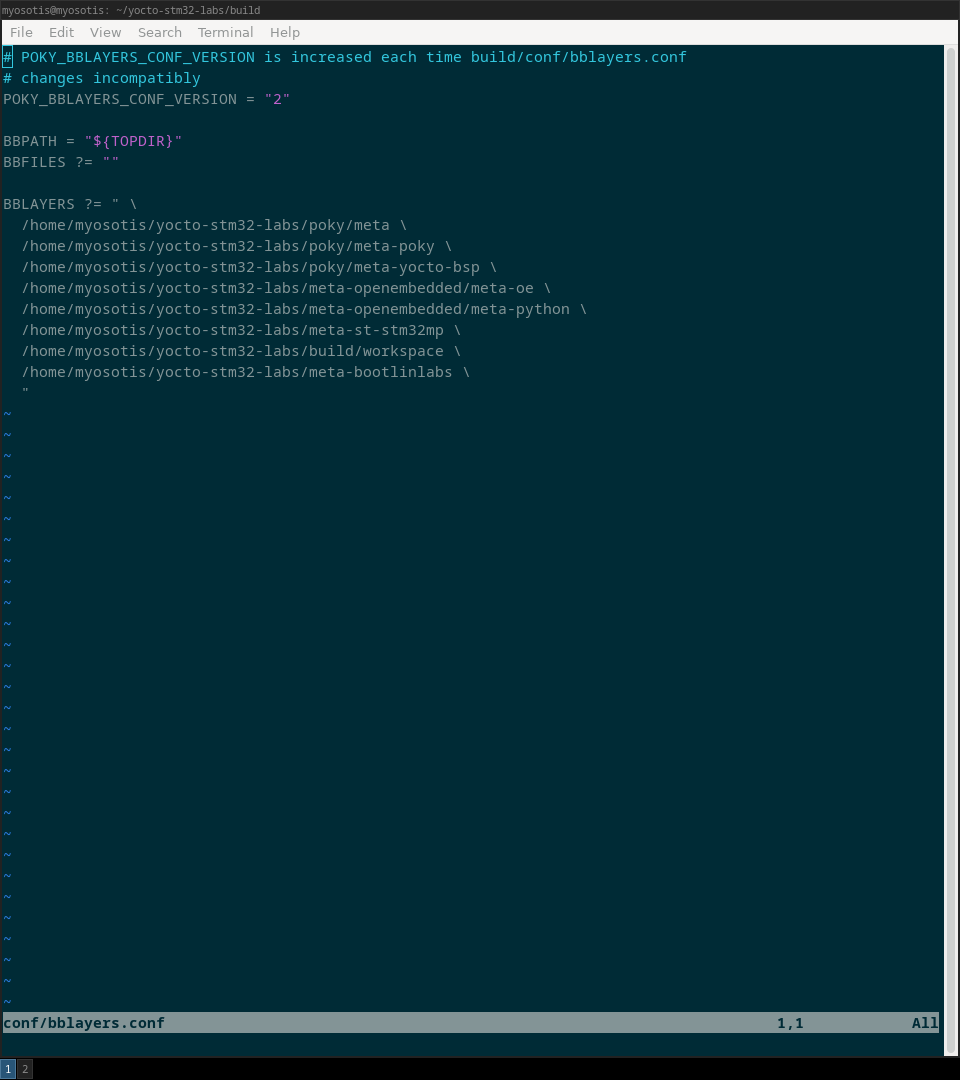
To integrate this newly created layer into the build, add it to the conf/bblayers.conf file:
We can now move the ninvaders recipe into our custom meta-bootlinlabs layer by simply copying all of the contents from /yocto-stm32-labs/meta-openembedded/meta-oe/recipes-extended/ninvaders to yocto-stm32-labs/meta-bootlinlabs. To can now either delete old files from the recipes-extended directory or leave them as they are. bitbake will build the ninvaders recipe with the higher priority first anyway. You can now check that ninvaders recipe is part of our new meta-bootlinlabs layer by running:
bitbake-layers show-recipes ninvaders
Applying patches to an existing recipe by adding joystick support
bitbake allows users to extend recipes by the means of .bbappend files. In this chapter we will go thorugh extending the linux-stm32mp recipe by applying a patch and including it into the build. This patch which will enable us to play nInvaders with Wii’s Nunchuck joystick.
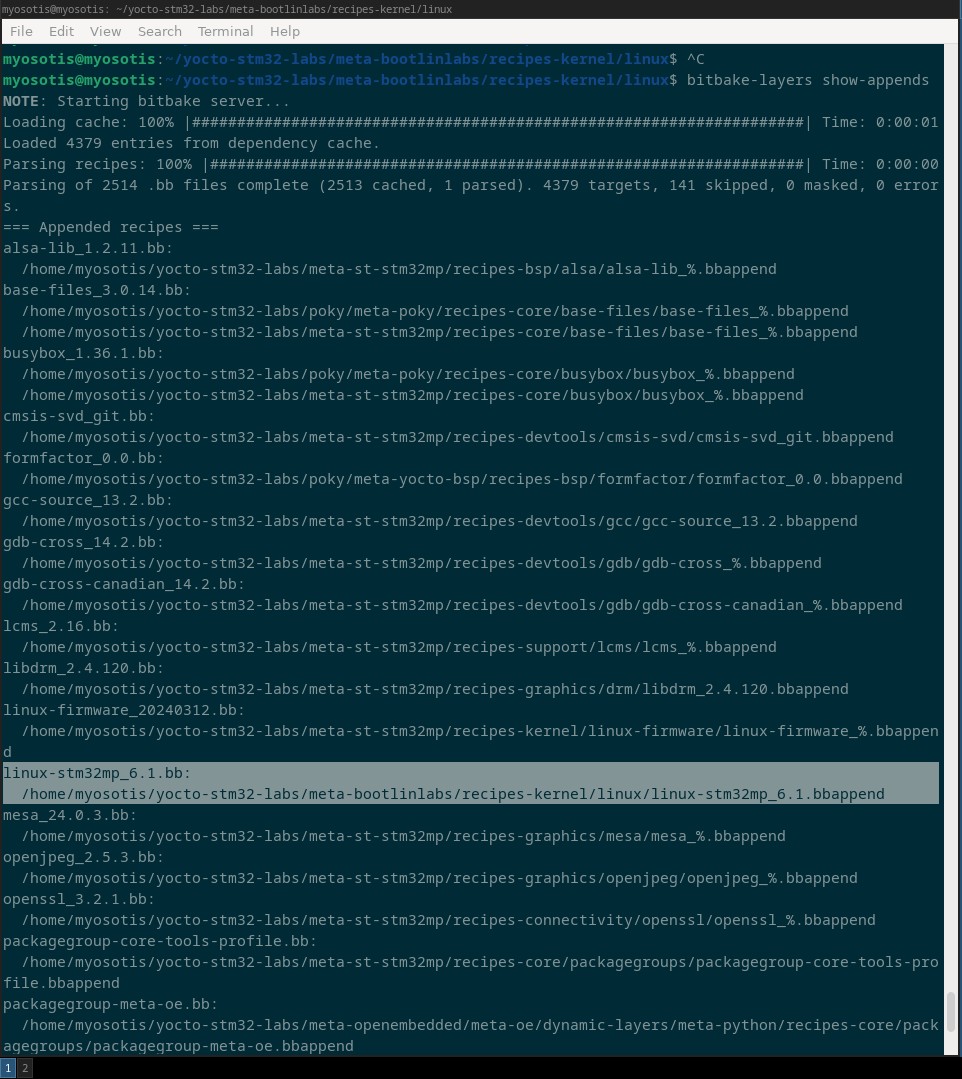
First, we will create a linux-stm32mp_6.1.bbappend file in the /yocto-stm32-labs/meta-bootlinlabs/recipes-kernel/linux directory.
You can now run bitbake-layers show-appends to see all the available bbappend files and the recipe they apply to. There you can see the .bbappend file we have created for our kernel recipe:
The content of the .bbappend file can be seen here, and here is the preview for illustrative purposes:
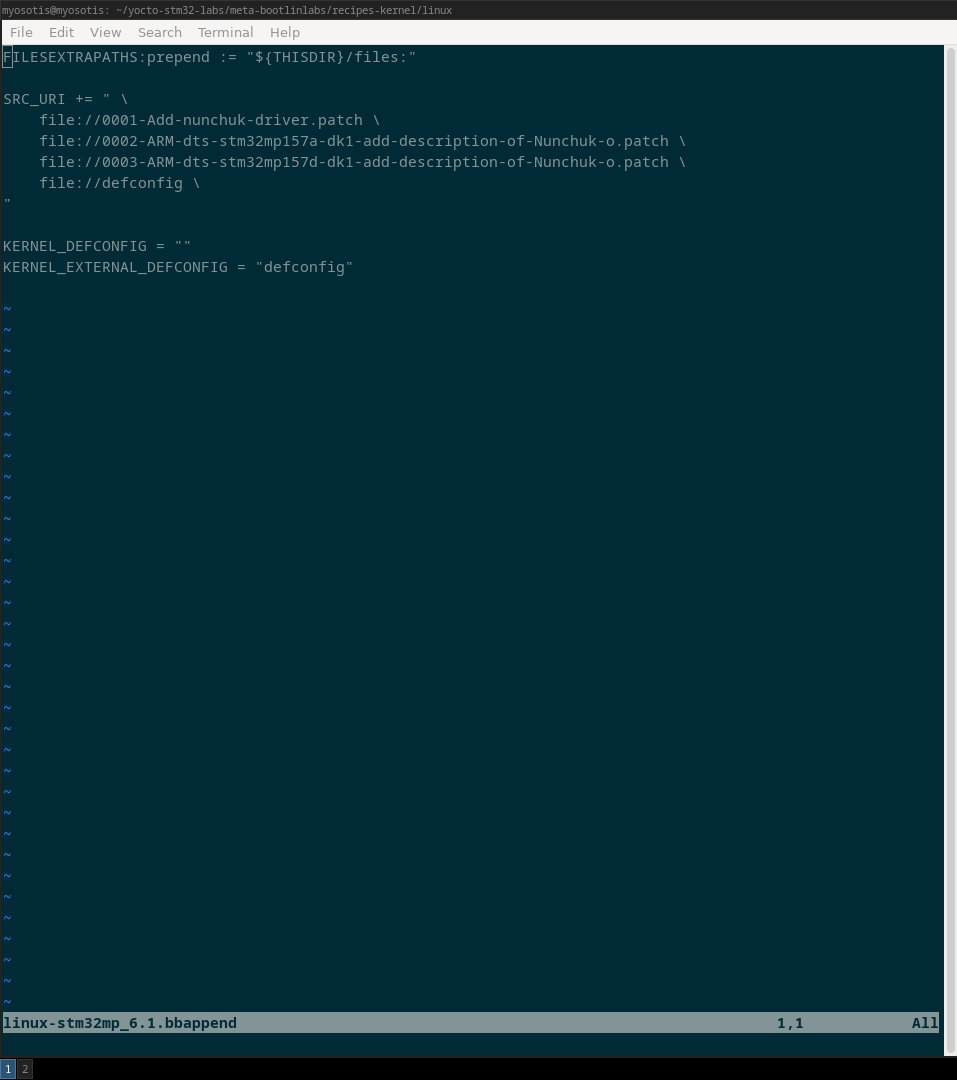
Notice how the .bbappend file matches the exact recipe name of a file we want to extend. The needed patch for using the Nunchuck joystick as input to our console was provided by Bootlin and is present on this link.
As you can see, defconfig and patches are present in the source file list. Last two lines are used as an inidication to the linux-stm32mp recipe to use kernel configuration as defined by defconfig.
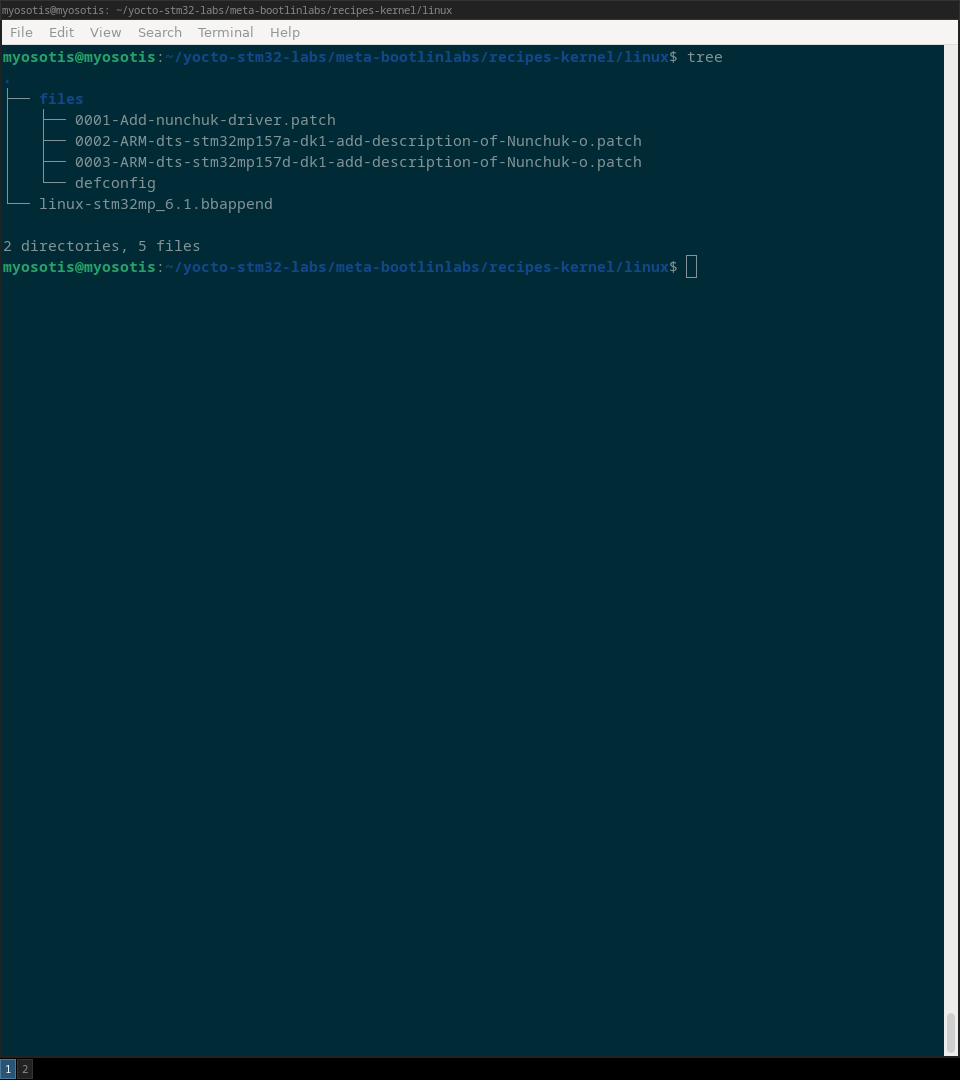
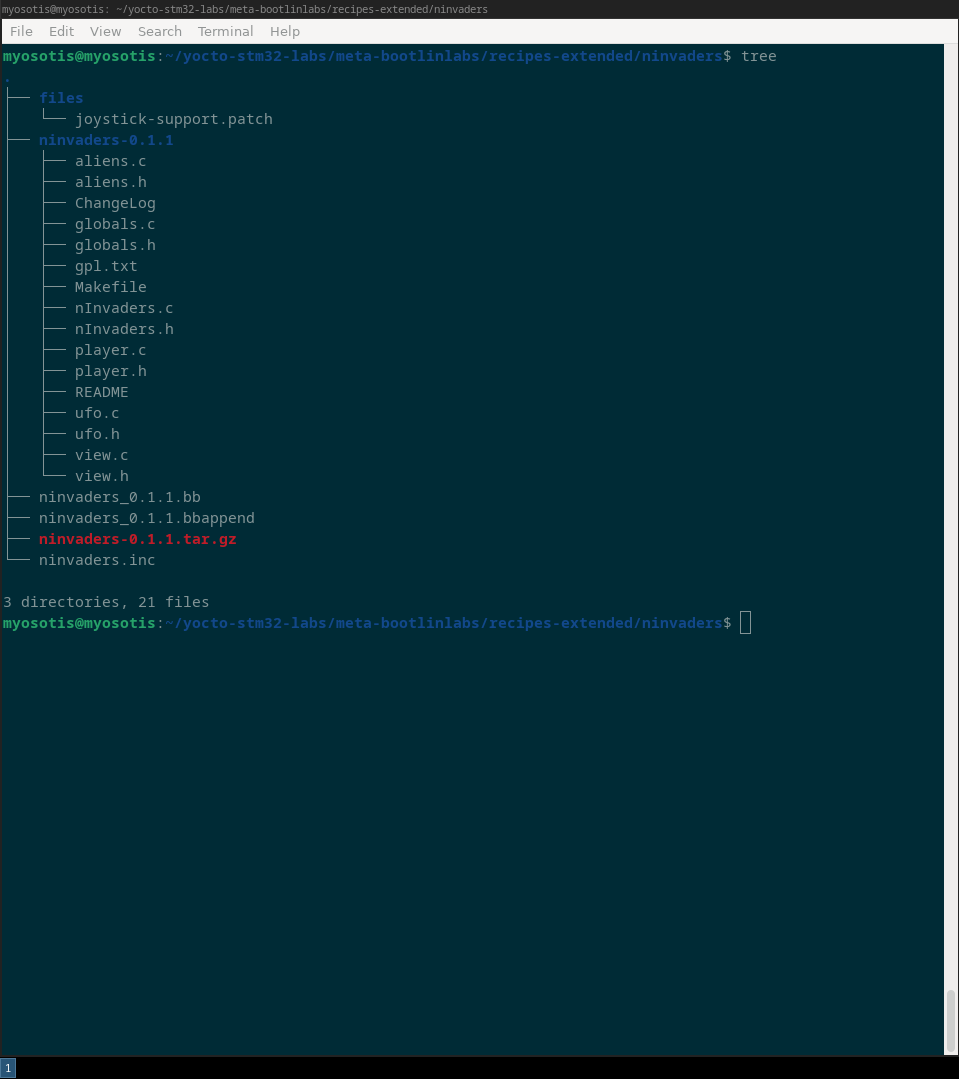
Treeview of the directory responsible for handling the nunchuck at the kernel level is now:
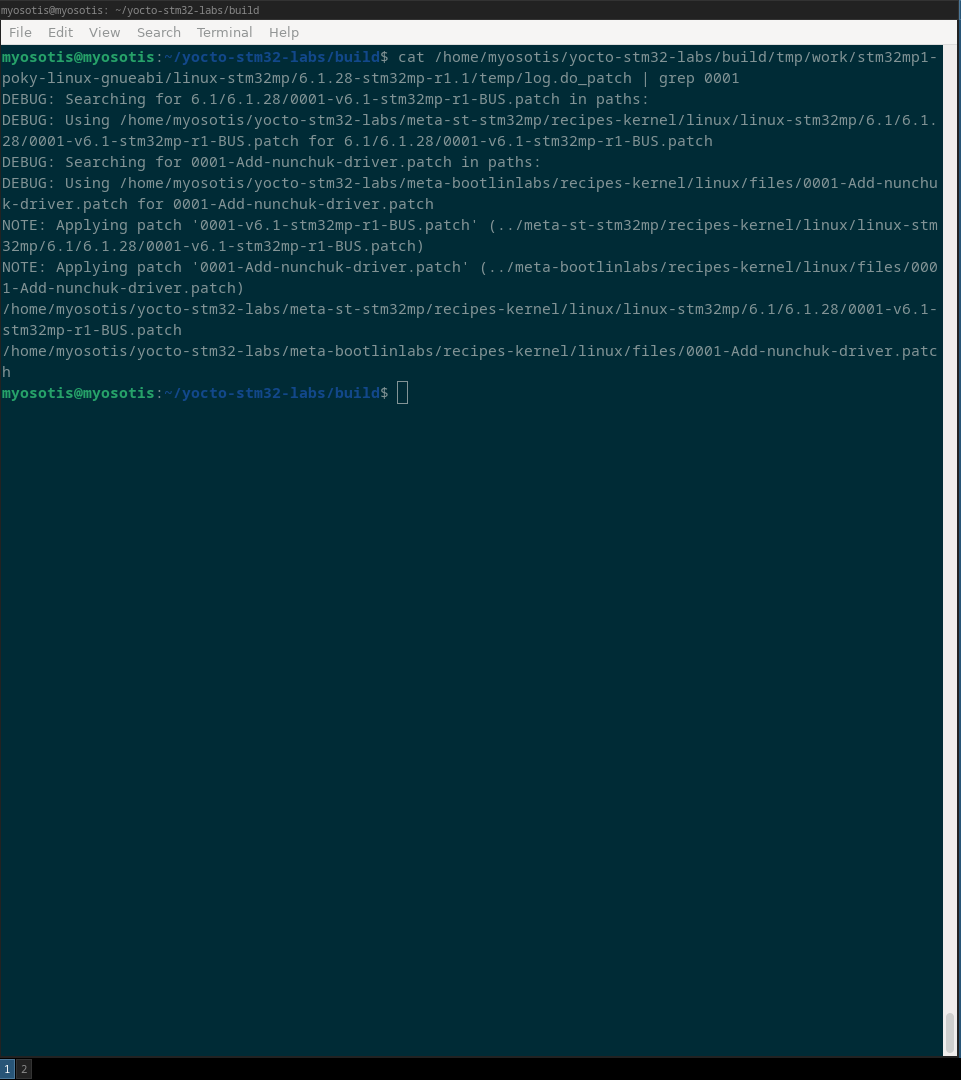
You can now rebuild the kernel to verify that the patches have been included into the build by running cat ... after rebuilding the kernel with bitbake virtual/kernel:
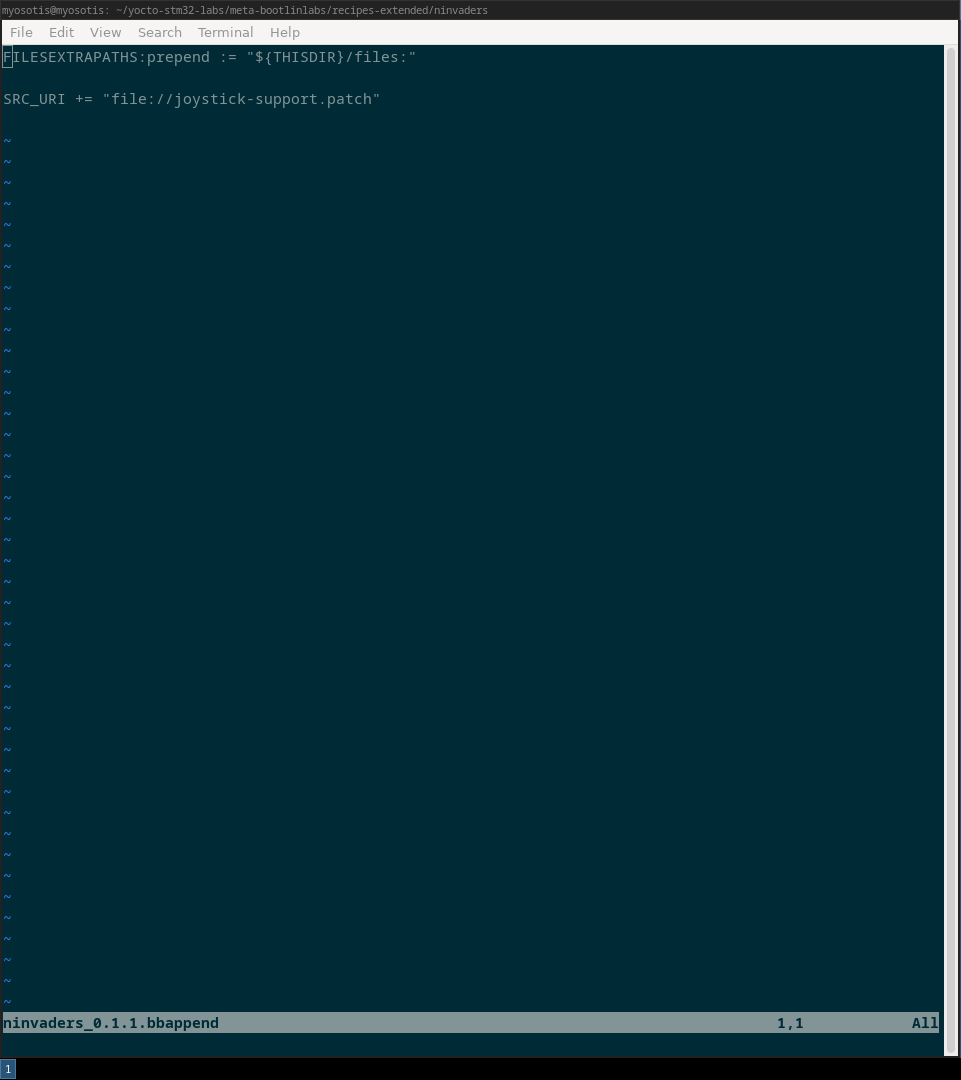
.bbappend file responsible for handling the nunchuck at the application level is here and looks like:
Treeview of the directory responsible for using the nunchuck in the game is now:
Transferring kernel image and device tree blob to TFTP
We can now rebuild the whole core-image-minimal and copy the newly generated kernel and device tree images to the TFTP server home directory (/srv/tftp in my case). Files you are looking for and that you want to transfer to the directory are:
- zImage
- stm32mp157d-dk1.dtb
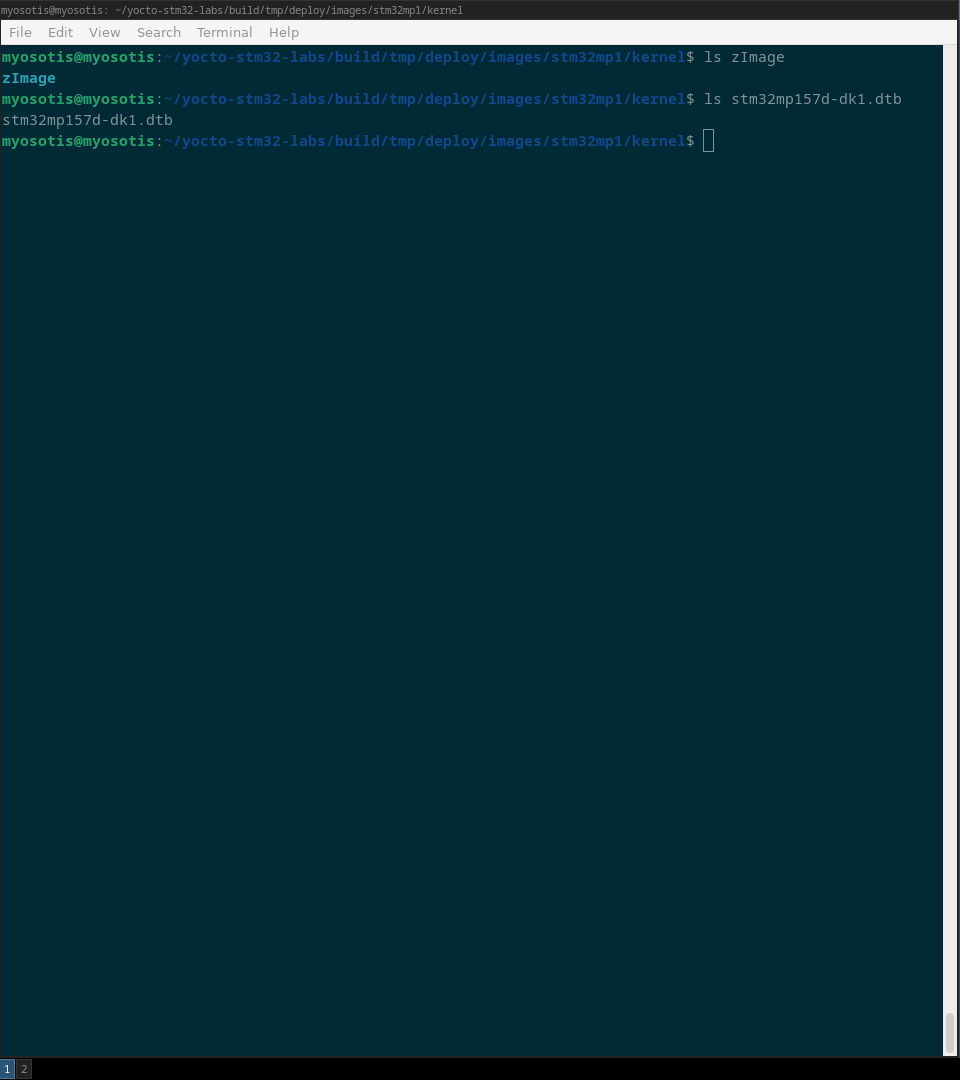
Whith these files now present, the board’s bootloade can now load the proper image with proper hardware support.
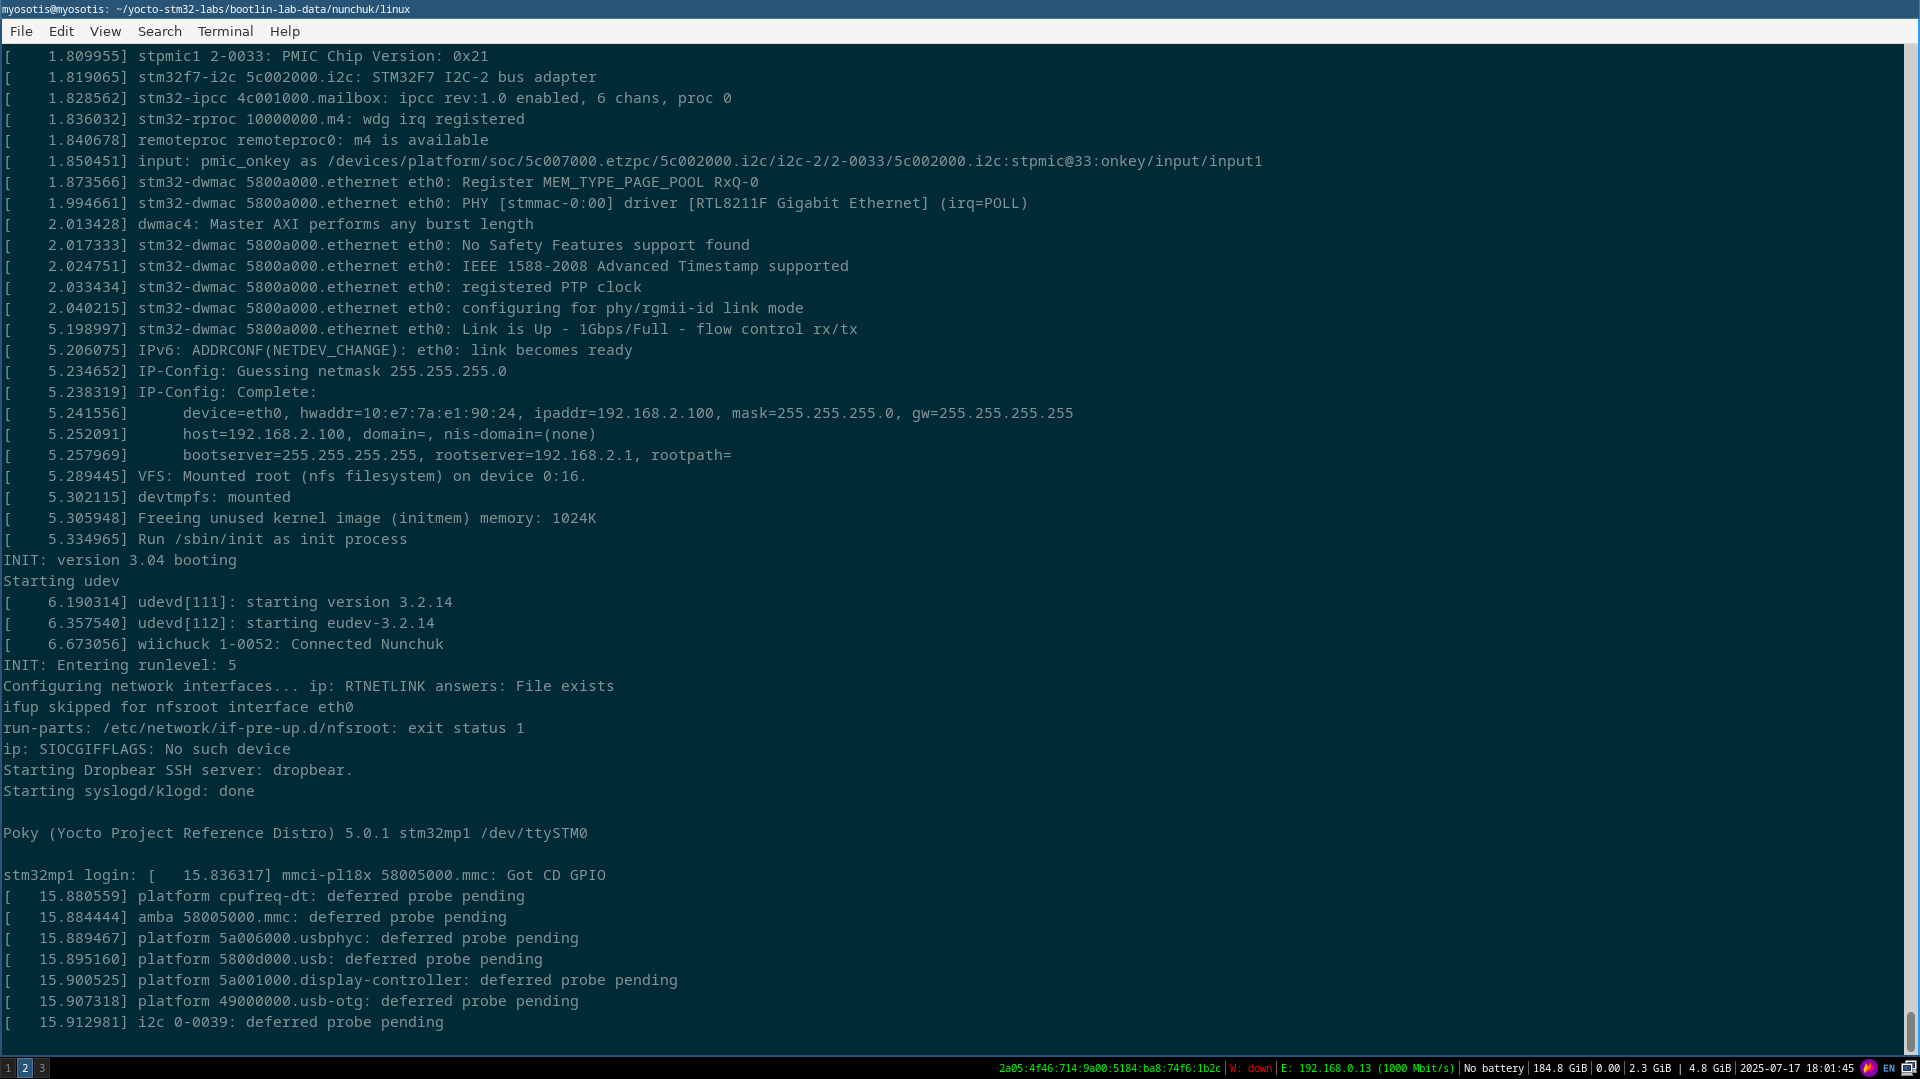
We can now reset the board and observe the boot logs until we have access to the command line. Near the end of the boot, we should now observe the following.
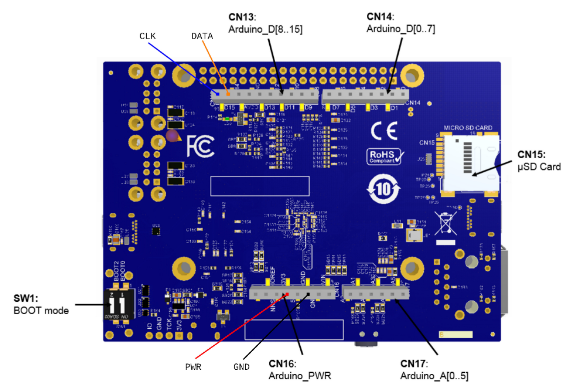
Testing the Nunchuck
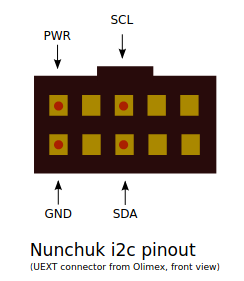
Connection diagram for the Nunchuck can be seen on following images provided by Bootlin:
You can now check that the Nunchuck is present and working by checking the presence of the js0 device file by running:
cat /dev/input/js0
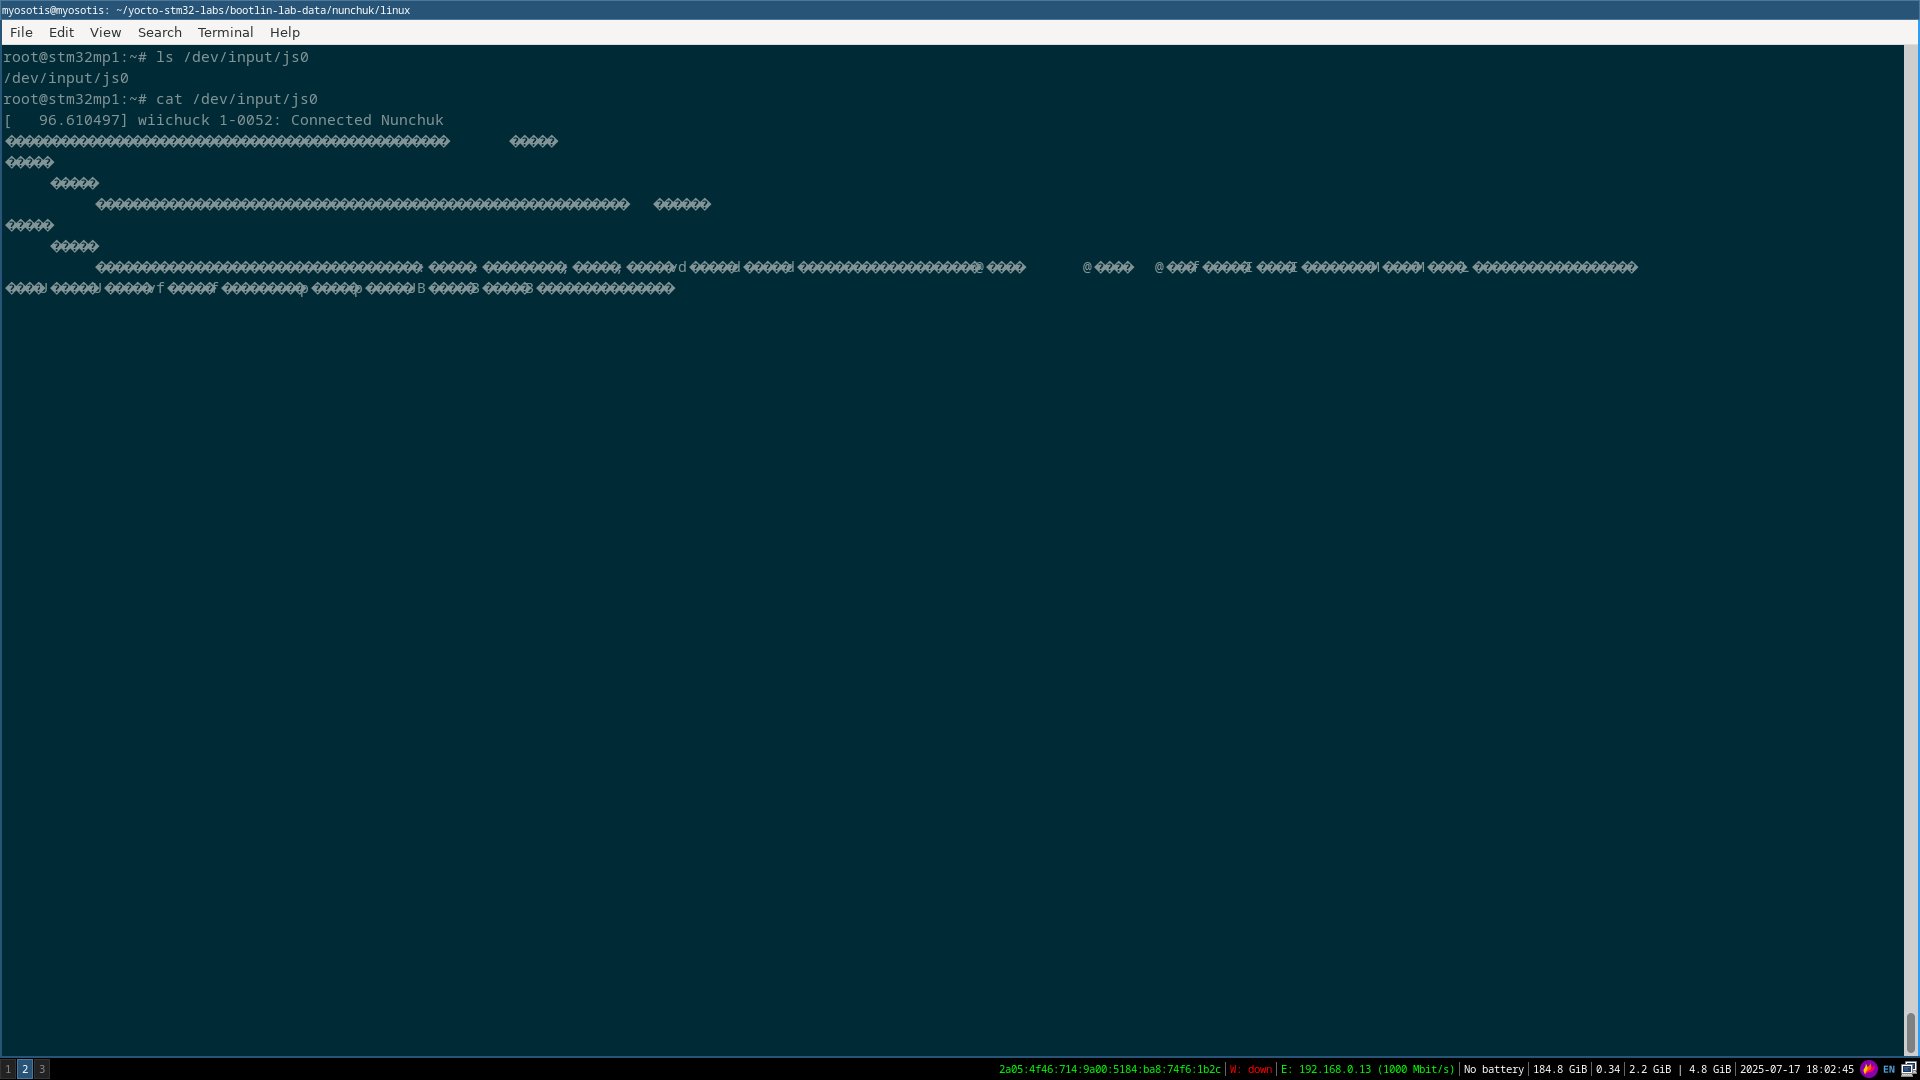
Notice the random characters that appear while both playing with the Nunchuck’s joystick or by even moving the controller since the driver we integrated also handles acclerometer events.
And now finnaly, simply run /usr/bin/ninvaders and use the C button on the joystik to confirm and fire and Z to pause the game:

Amd that’s it.